Welcome....

"...at its core....art is simply the language of the soul" -Robert Redford

Thanks for stopping by. Please enjoy your stay here. Have some Sweet Tea, grab a chair and sit a spell. Rekindle your SOUL, Embrace the ART and Believe your DREAMS. Stay as long as you like and come back soon. Friends are always welcome here.

Monday, March 30


These are yumm-o!! Just baked them. They were good warm, but I think WAY better once they have cooled. I made a double batch and it made about 18 muffins. I discovered them while blog hopping here:


1 cup pecans, chopped

1 cup brown sugar, firmly packed

1/2 cup flour

2 eggs

1/2 cup butter, melted and cooled

1/2 teaspoon vanilla


  • Preheat oven to 350F.

  • Combine the pecans, brown sugar, and flour in a large bowl.

  • In a medium bowl, beat the eggs until foamy and stir in the cooled butter and vanilla.

  • Add this to the dry ingredients, stirring until moistened.

  • Pour into a lined muffin tin, or a sprayed silicone pan.

  • Spoon the batter into the cups to about 2/3 full.

  • Bake for 20-25 minutes or until a tester comes out clean.

  • Remove the muffins from the pan immediately and cool on wire racks.

  • Makes 9.

    If you want them puffed up above the pan, fill the pans at least 2/3 full.

Friday, March 27

Thinking spring and summer jewelry.....


.....I was just able to purchase a few new garments for my wardrobe. I'm needing something new since I'm going home to visit the family in May. I figure since I'm a jewelry maker, I should have some new pieces to wear with my new threads!! :::Smiles:::


I LOVE bracelets, especially ones that move around and make noise!! LOL So, I made myself this MOP shell bracelet. It features 2 sizes and 3 colors of MOP shells on jump rings attached to a silver charm bracelet. It has lots of movement. I think it will be great for summer. I need to make some ankle bracelets to wear too......I really enjoy them too. Anyhow, here is the first new jewelry offering from me!!


If you like this bracelet or are interested in some others I have made, don't forget to check out my Etsy shop. If you don't see exactly what you are looking for, just lmk. I happily take custom orders. Enjoy!! http://www.shellyraewood.etsy.com/

Thursday, March 26

Another Iris Fold Challenge - Think Spring


We have a monthly lottery challenge over at my ART group. The theme for March was "Think Spring" and anything goes. I seem to be in an Iris Fold mood lately!! I love this Calla Lily pattern. I modified it a bit (by tripling it) and placing it in the foreground of a lush spring garden scene. I really like how it turned out. The scan does not do it justice......the Lillies are made from a pearl shimmer vellum paper and they really do shimmer.

Wednesday, March 25

Another new Iris Fold for a challenge

I made this pink bunny iris fold mixed media collage today. It is for a challenge over at my friend Autumn's blog. She provided the bunny template and we are challenged to use it in an ART piece. This is my interpretation. The Collage, titled "HOP" is 8 x 10 and is listed in my Etsy shop.
http://www.etsy.com/view_listing.php?listing_id=22824622

You can view Autumn's blog and the bunny template challenge here: http://autumnsantics.blogspot.com/.


I photographed the collage hanging from my Fringe Tree, which is beyond gorgeous right now. Here are a couple of shots of her too!! :::smiles:::

Tuesday, March 24

Sunshine, Flowers, Birds, Breezes.....Think "Halloween"??

Yep, you heard that right. Outside in South Georgia it's another lovely SPRING day. There's a gentle breeze, warm sun, birds are singing, squirrels are squirreling, the dogwoods and azaleas are blooming.......and I'm supposed to be thinking about Halloween!! Why you ask?? Well, my ART group is being showcased in Stamp & Scrap magazine!! http://www.scottpublications.com/ssa/ Woo Hoo.


So, we are to all make some ART to submit along with the article. But here's the kicker....it's for the October Issue!! LOL I don't even own any Halloween stamps any more. I sold so many of my stamps before we moved. And the deadline is quick so I really don't have time to order any either. Most of my current ARTwork is not stamped, or at least not the main focus. So, what's a girl to do?? Improvise of course. I have 3 projects in mind.......one is finished. I did put out a call to my old ART group in Illinois to mail me some stamped images, which they ever so sweetly did!! I plan to make an Iris Folded something and also a Puzzle Cube. For now, I made a Paperweight. They are very cool. You cut your picture or ART to fit and pop on the glass top.....voila.....instant ART paperweight. You can find them at http://www.dollartree.com/.

I used a haunted ATC background image and my fave gal Jenna from Paper Imagery Designs. http://www.paperimagerydesigns.com/. Her hat is actually a stamp I had that I used on black paper and then cut out. I added highlights to her hat with my always fave Clear Stardust Gel Pen by Sakura. http://www.sakuraofamerica.com/Pen-Glitter. The spider was embellished with a black glaze gel pen. The letters for "SPELL" were made using a Dymo labeler and then punched out with a paper punch. And I completed it with the addition of mini black rick-rack around the edges.

On the flip side I made a mini collage of stamped Halloween Images, signed it and then sealed it with a generous layer of Diamond Glaze, http://www.diamondglaze.com/ which btw, took 3 DAYS to dry!! LOL The edges are covered in baby black rick-rack and some antique silver glitter. Enjoy!!

Monday, March 23

New Iris Fold Cards

I always make 2 one-of-a-kind Birthday cards for my Mom that she gives to my cousin's 2 kids for their April Birthdays. This year they are having Dora the Explorer and Diego for their party theme. Here are the 2 Iris Folded cards that I made for them. I think they turned out really cute. The third picture shows their envies peeking out. You can learn how to make your own envelopes by checking out my tutorial over on the side bar. :) Enjoy!!


New ART from me.....

.....can't believe it's been almost a week since I've updated this puppy. I must be doing that "in my head" thing again. Sometimes I do that in my ART groups. I'll sort of answer the emails in my head and never really get around to typing them out!! Geesh!!


I also completed my Tussie Mussie cone for my mingle. I already posted the pics of it unfilled. (http://shellyraewood.blogspot.com/2009/03/easter-cone-or-tussie-mussie.html)
Here it is ready to go, hanging from my beautiful Fringe Tree.

Besides filling it with all pink chocolate Easter Bunnies and shredded paper, I made a pair of earrings for the lucky recipient. Here they are, displayed on an ATC card I made. They are Vitral and Pink faceted crystals.


I placed them in one of the origami boxes I was making last night out of scrapbook paper. You can find out how to make them here: http://www.origami-instructions.com/origami-box.html


Guess that's enough from me for today!! :::Smiles::: Enjoy!!

Tuesday, March 17

Cool new online tool

Found these nifty widgets while looking for ideas for "Quilties". It's a new mingle I signed up for. This is fun!! The first allows you to select a focal color and shows you matching and complimentary colors to go with it. THe second is my fave. You choose one of your pictures you wish to use and it gives you your color palette from that picture to work with. Try them out....it's fun!! :::smiles:::


Easter Cone or Tussie Mussie

My yahoo ART group is having an Easter/Spring Tussie Mussie aka cone mingle. I didn't really have any papers I liked for Easter that weren't "cute" so I went with a good springy color and my fave after black, PINK!! I have this wonderful PINK daisy paper and thus my theme was born.


  • I cut a 10 inch square sheet of the Daisy Paper using a fancy edge blade in my rotary cutter.
  • Added some subtle sparkle using my Sakura Stardust Clear glitter pen along the "lines" of the pattern.
  • Added some tiny sparkly flower stickers (they look more like tiny gems).
  • Rolled up the PINK cone and secured her with double sided adhesive.
  • Added PINK satin ribbon and PINK rick-rack trims around the cone and over the seam.
  • Inserted a "tassel" made from iridescent silver icicles.
  • Punched out 2 sizes of daises with my McGill daisy punches and colored their centers with a Souffle Pen to match the cone paper daisies.
  • Attached the daisy punch outs around the cone on top of the ribbons and rick-rack with adhesive dots.
  • Added some silver outline sticker daisies to the inside of the cone which I colored with a White and a Peach Souffle Pen.
  • Added the PINK phrase "This is the GOOD life".
  • Handles were fashioned with 2 lengths of stiff, shiny PINK trim and attached with PINK flower brads.
  • Added some PINK shredded paper for filler.

Now I have only to fill her up and send her on her way. :)

Sunday, March 15

This and That.....

....well today started out good and quickly went downhill only to rebound again!! LOL I was outside snapping some pics of the now blooming and just gorgeous Azaleas (in my footwear of choice, flip-flops). I feel something on my toe and glance down to see that I'm standing in a patch of poison ivy that has somehow sprung up in our yard near the azalea hedge!! Ack!! This has serious connotations for me, with compromised skin to begin with. So, I calmly walked in the house and began scrubbing my feet, shoes and then hands!! Somehow, so far, I have remained unscathed!! Hubby says that since it was a small contact and I immediately scrubbed the area I should be fine!! Here's hoping!!
So, I quit taking pics after that but did take a few to share. Our school district has built a HUGE new High School that will open in Fall 2009. They have put out a call for photos of our area to showcase the walls. I was hoping to submit some pics for consideration. These are from this morning:
White Azalea - my fave

Bright Pink Azalea


Pale Pink Azalea


Japanese Magnolia


My Camellia

and these are some I have taken sometime over the course of the 14 months I have now lived in South Georgia that I may submit. Any favorites?? Enjoy!!

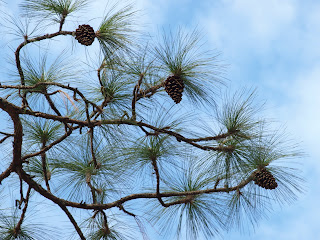
Fallen Cone


Pine Cones


Hanging Moss


Hanging Moss


One of my very fave pics

Friday, March 13

Shredding Scissors

So, I went to an Estate sale this morning. Nothing really caught my eye but I headed to the kitchen to check out the offerings there. I pick up a strange looking pair of scissors, labeled "Shredding Scissors." Interesting.....not exactly sure what they are for, but I "knew" I needed them. Hey they were only $2!! Yes, I know.....girl math strikes again!! Sorry honey.

So, I get home and open them up.....they are these nifty, multi-blade scissors. Yep......they cut 5 lines, side-by-side. So, what can I do with these?? Well, you COULD use them for their actual purpose of "shredding" up a document instead of firing up the big shredder. Or.....you can fringe the edge of a piece of paper or card......or you can make tons of tiny square confetti!! I'm sure I'll come up with more as I take time to play with them. Here are a couple of links so you can see them and what they can do:

http://www.coolhunting.com/archives/2006/06/shredding_sciss.php

http://www.containerstore.com/browse/Product.jhtml?CATID=62523&PRODID=10020976


I also bought a snowman candle warmer from Lang, a vintage locking jewelry box and 2 old mini muffin tins to ART on.


Wednesday, March 11

Now for some ART....

.....I am currently participating in a Magic Wand mingle. Here is my finished wand, currently zipping along on it's way to the West Coast. I named it "Starry, Starry Wand".


I started with a star shaped photo holder, added a copper tubing handle and sprayed it silver. I added crystal beaded dangles in each star and then the stems are all beaded in glass beads on wires. I added 2 kinds of Christmas Icicles for some flair and wrapped the handle in holographic silver star ribbon. It was further embellished with silver die-cut words and sheer white ribbon. The end of the tube is filled with a faceted cubic zirconium. All in all I like how it turned out.

Also I am participating in an Easter Egg Garland swap. I had to make 20 eggs and will receive 20 in return that I can string as a garland. Here are my take on the eggs!! I cut out the egg shapes from cardstock. I layered and trimmed varied widths of print papers, added rick-rack and ribbons, pounded in some eyelets, added some rimmed vellum tags and silk flowers and finished up with some glitter. Not my usual style or palette but I think they work for the intended outcome!! :::Smiles:::


Yes, I am still alive.....

.....just behind. I had to take a break before the parental units came for a visit and then still to get the house and studio back on track!! Whew!! What a crazy 2 weeks. We had such fun with the family, even though the weather wasn't cooperating as much as I had hoped. We spent time at the beach twice while they were here. Here a few highlights of the trip. I managed to check off 3 items from my "bucket list". 1) Find a starfish (and it is HUGE, nearly 10-12") 2) See stingrays swimming while at the beach. (ummmm.....be careful how you word those bucket list items.....I was about 15 yards off shore when suddenly there were 6 of them swimming around me.....totally cool. I wasn't worried at all.....but everyone else freaked out when I told them about it later) It was awesome. 3) I wanted to see manatees just out cruising around in the water. There is a power plant near Bradenton, FL that has a manatee viewing park. Too cool.....there were 30 of them just swimming around with some sharks and sting rays thrown in for fun. I was totally enthralled!! Plus we found quite a few sand dollars off Anna Maria Island, FL. We never seem to find them at the Cape. Here are some pics to enjoy!! :::smiles:::